How to Use Inpaint to Fix Eyes in Stable Diffusion [2023]
Have you ever wondered about the magic behind creating lifelike images with technology? It’s all thanks to artificial intelligence! But, as impressive as it is, it’s not flawless. Sometimes, especially with the Stable Diffusion model, some parts of the pictures, mainly the eyes, don’t look as good.
They can seem odd or out of place. But this can be fixed with a tool called Inpaint. In this blog post, we’ll discuss Inpainting, how it works, and the steps to make those eyes look right in Stable Diffusion images.
Table of Contents
- What is Inpainting?
- How does Inpaint work?
- How to fix a character’s eyes with Inpaint in Stable Diffusion?
- Step 1: Save your image and copy your prompt
- Step 2: Access the Inpaint tab
- Step 3: Import your image and mask the problematic area
- Step 4: Adjust sampling steps and method
- Step 5: Match image dimensions
- Step 6: Enable face restoration and increase the batch count
- 7: Set Denoising Level
- Step 8: Generate Corrected Images
- Inpaint in Stable Diffusion vs alternatives
- Final Thoughts
What is Inpainting?
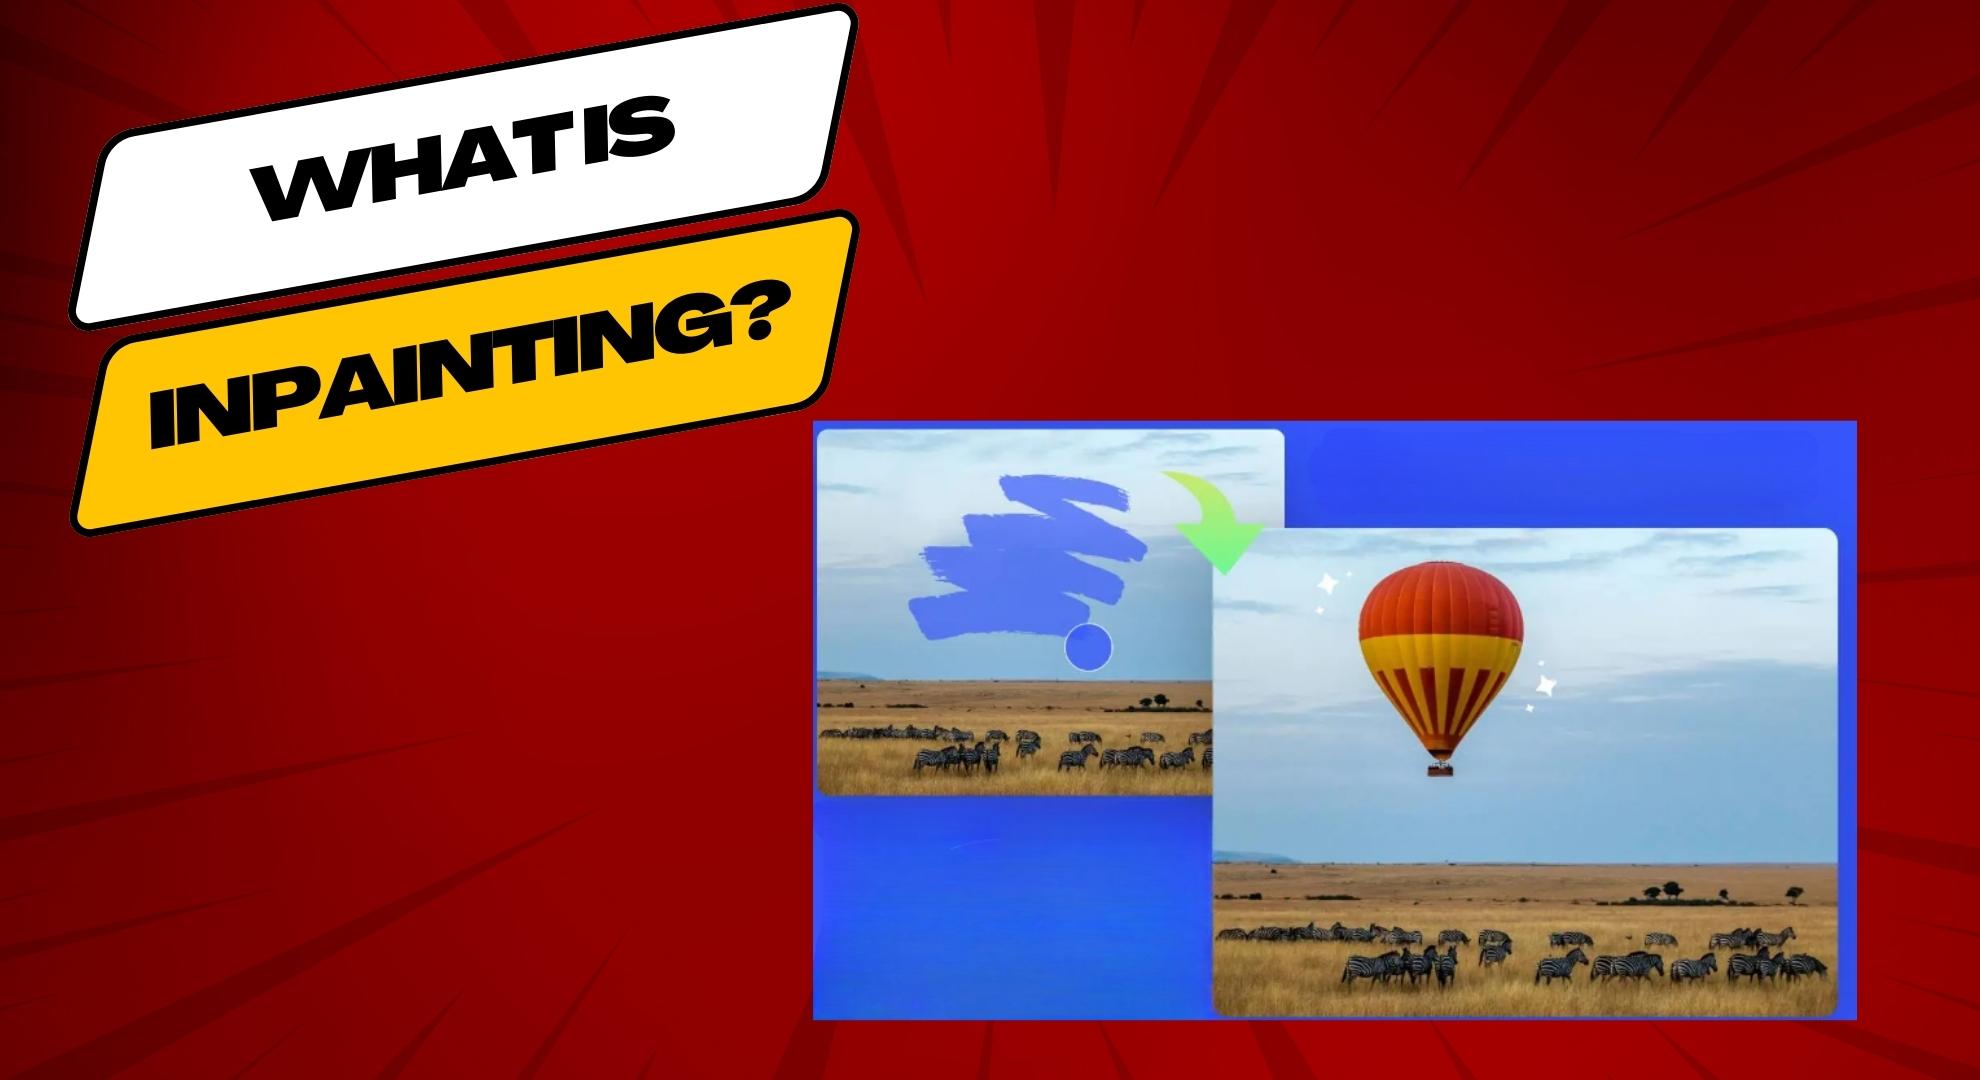
Inpainting is a way to fix parts of an image that might be damaged or missing. For example, in Stable Diffusion, you can use Inpaint to glitch faces in AI-generated images to look better. You can either change the whole face to look like someone else or fix just some parts, like the eyes while keeping the face the same.
Here’s a quick summary of what Inpaint can do:
- Inpaint helps fix or fill in parts of images that are damaged.
- Content-aware tools in software fill gaps in images by using Inpainting
- Computer vision, medical imaging, video editing, and image restoration are a few examples of uses of Inpaint.
- It works on fixing significant missing parts or tricky contexts.
- CNNs and GANs algorithms make Inpainting look more natural.
How does Inpaint work?
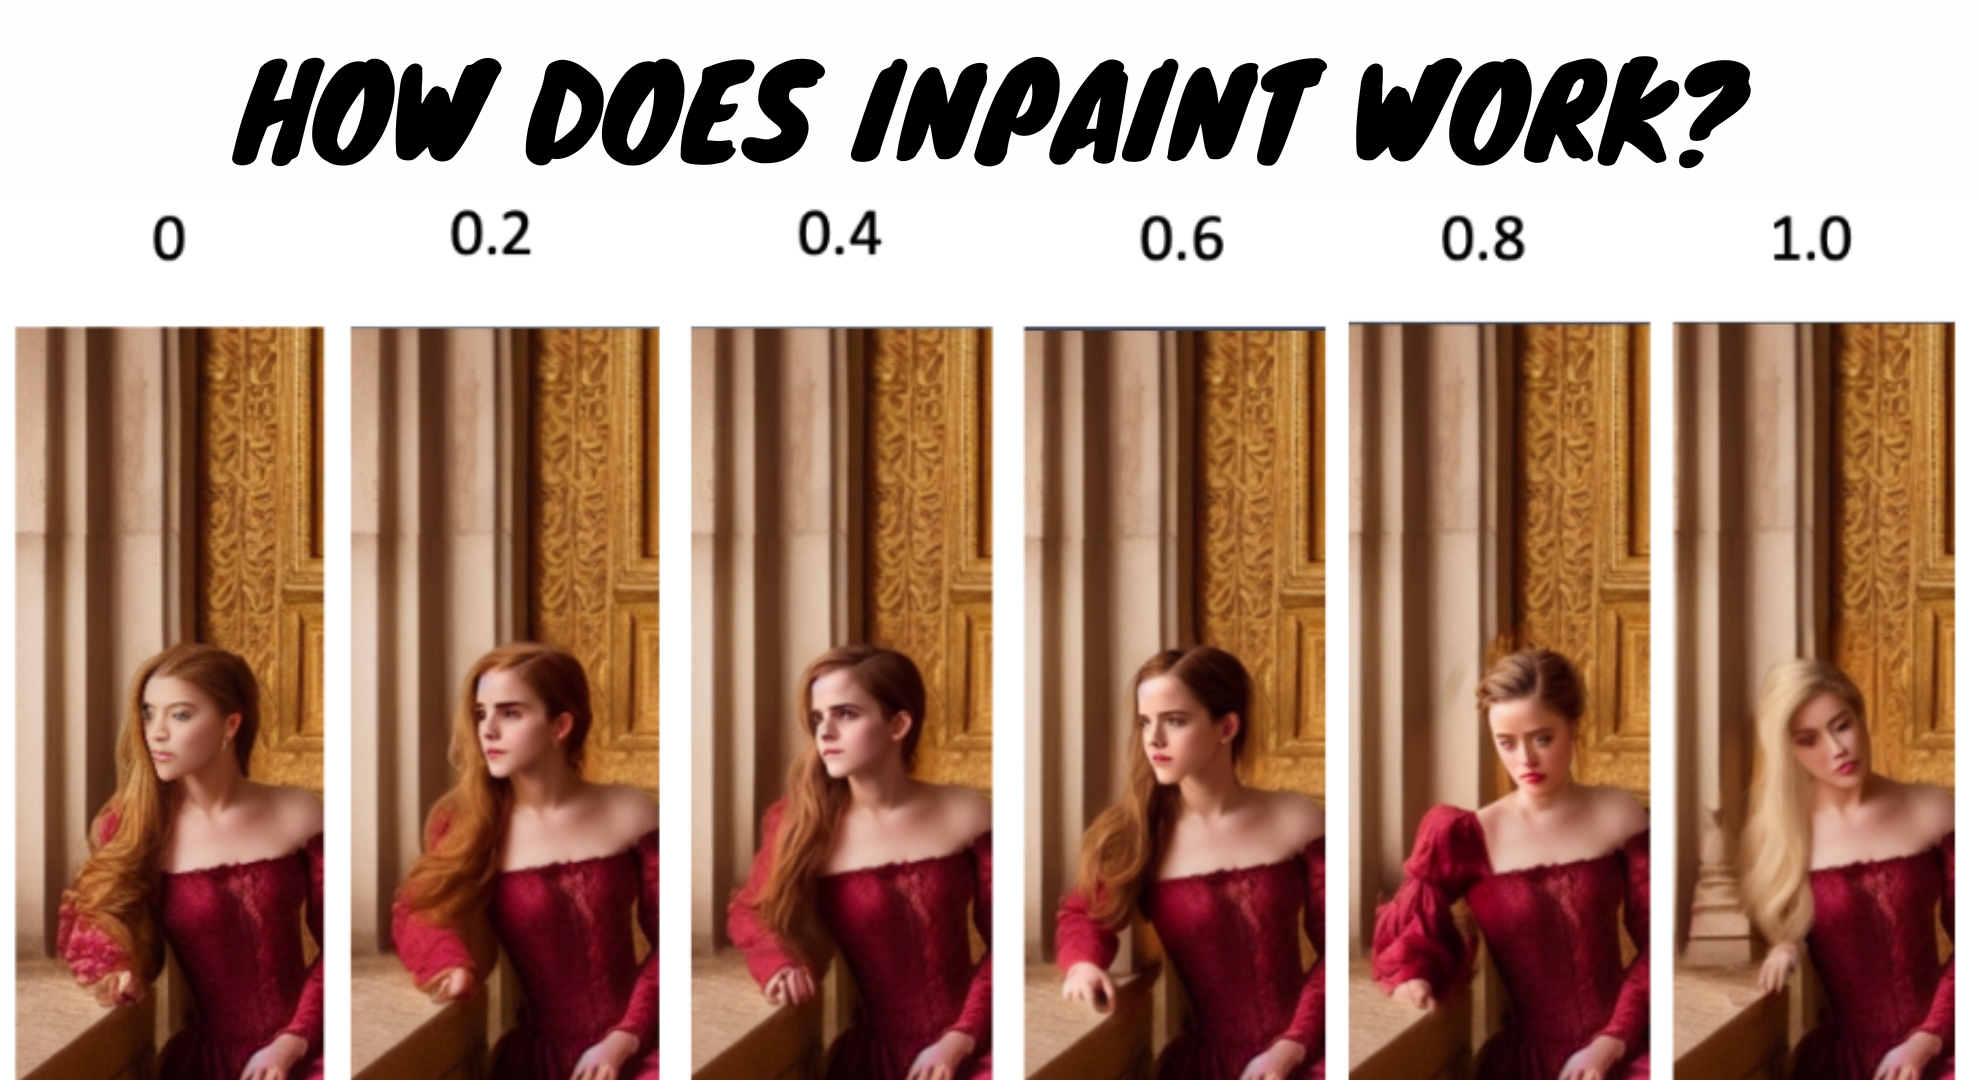
Inpaint is like a digital magic tool that fixes problems in pictures, like missing or damaged parts. First, it looks at the patterns, shades, and colors near the problematic area. Then, it uses different ways to fill in the missing or damaged parts.
Some ways are simple, like linking the dots in a straight line. But AI smart algorithms also use data they’ve learned from many pictures to fill the gaps. These algorithms synthesize data to seamlessly blend the inpainted region with the surrounding pixels, generating an image that is visually consistent and coherent.
The resourceful inpainting methods use things like learning patterns from many photos. They get what’s special about a picture, which helps them fix even tricky problems. The result? A fixed picture that looks just like the original, without any signs of damage.
How to fix a character’s eyes with Inpaint in Stable Diffusion?
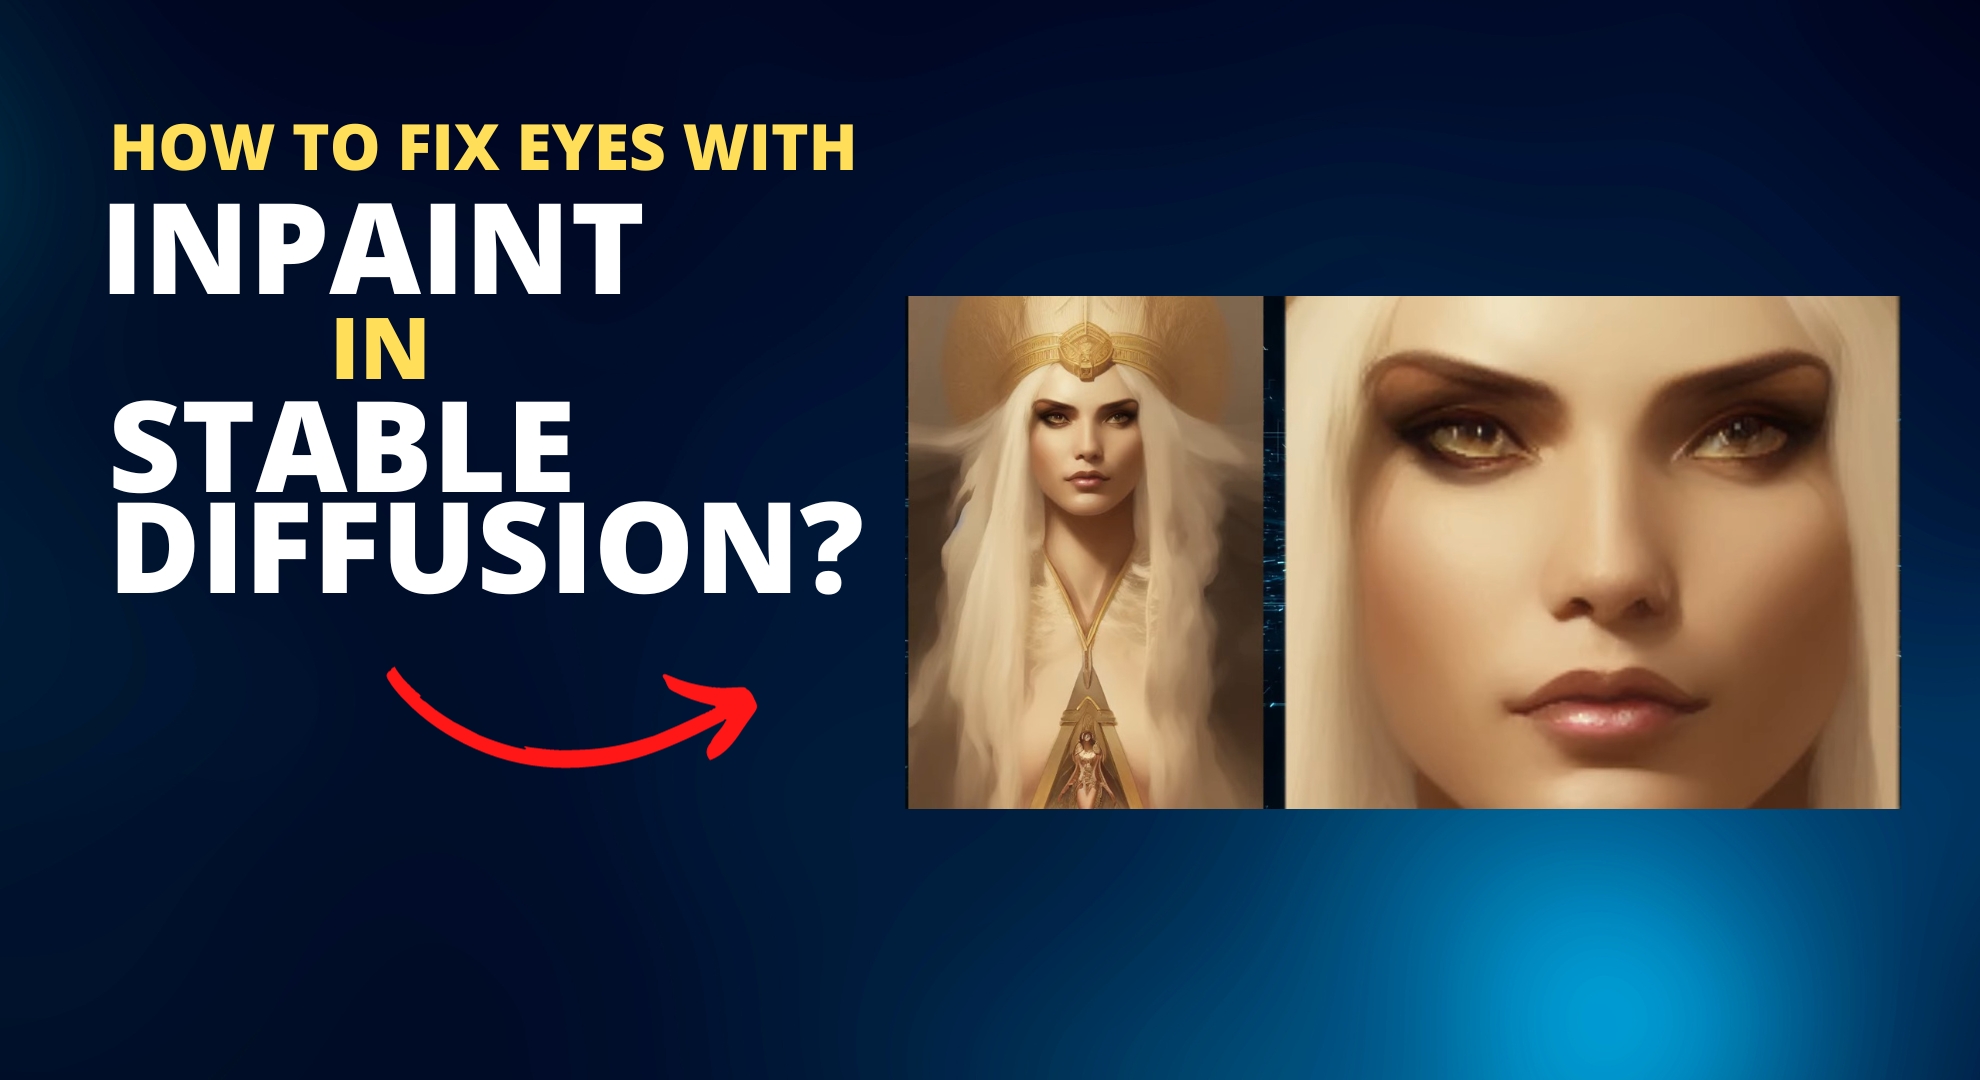
Inpainting is a handy tool in the AUTOMATIC1111 stable-diffusion-webui. It helps fix images where something’s missing or looks wrong. A common use is fixing faces that didn’t turn out right with Stable Diffusion.
With the inpainting tool, you can pick the part of the image you want to fix, and then the tool will automatically generate a new image. It fills in what’s missing or wrong, making the image look good again. If you want to use it, look for the “Inpaint” option in the img2img section. Here’s a step-by-step guide on using Inpaint to make eyes look just right:
Step 1: Save your image and copy your prompt
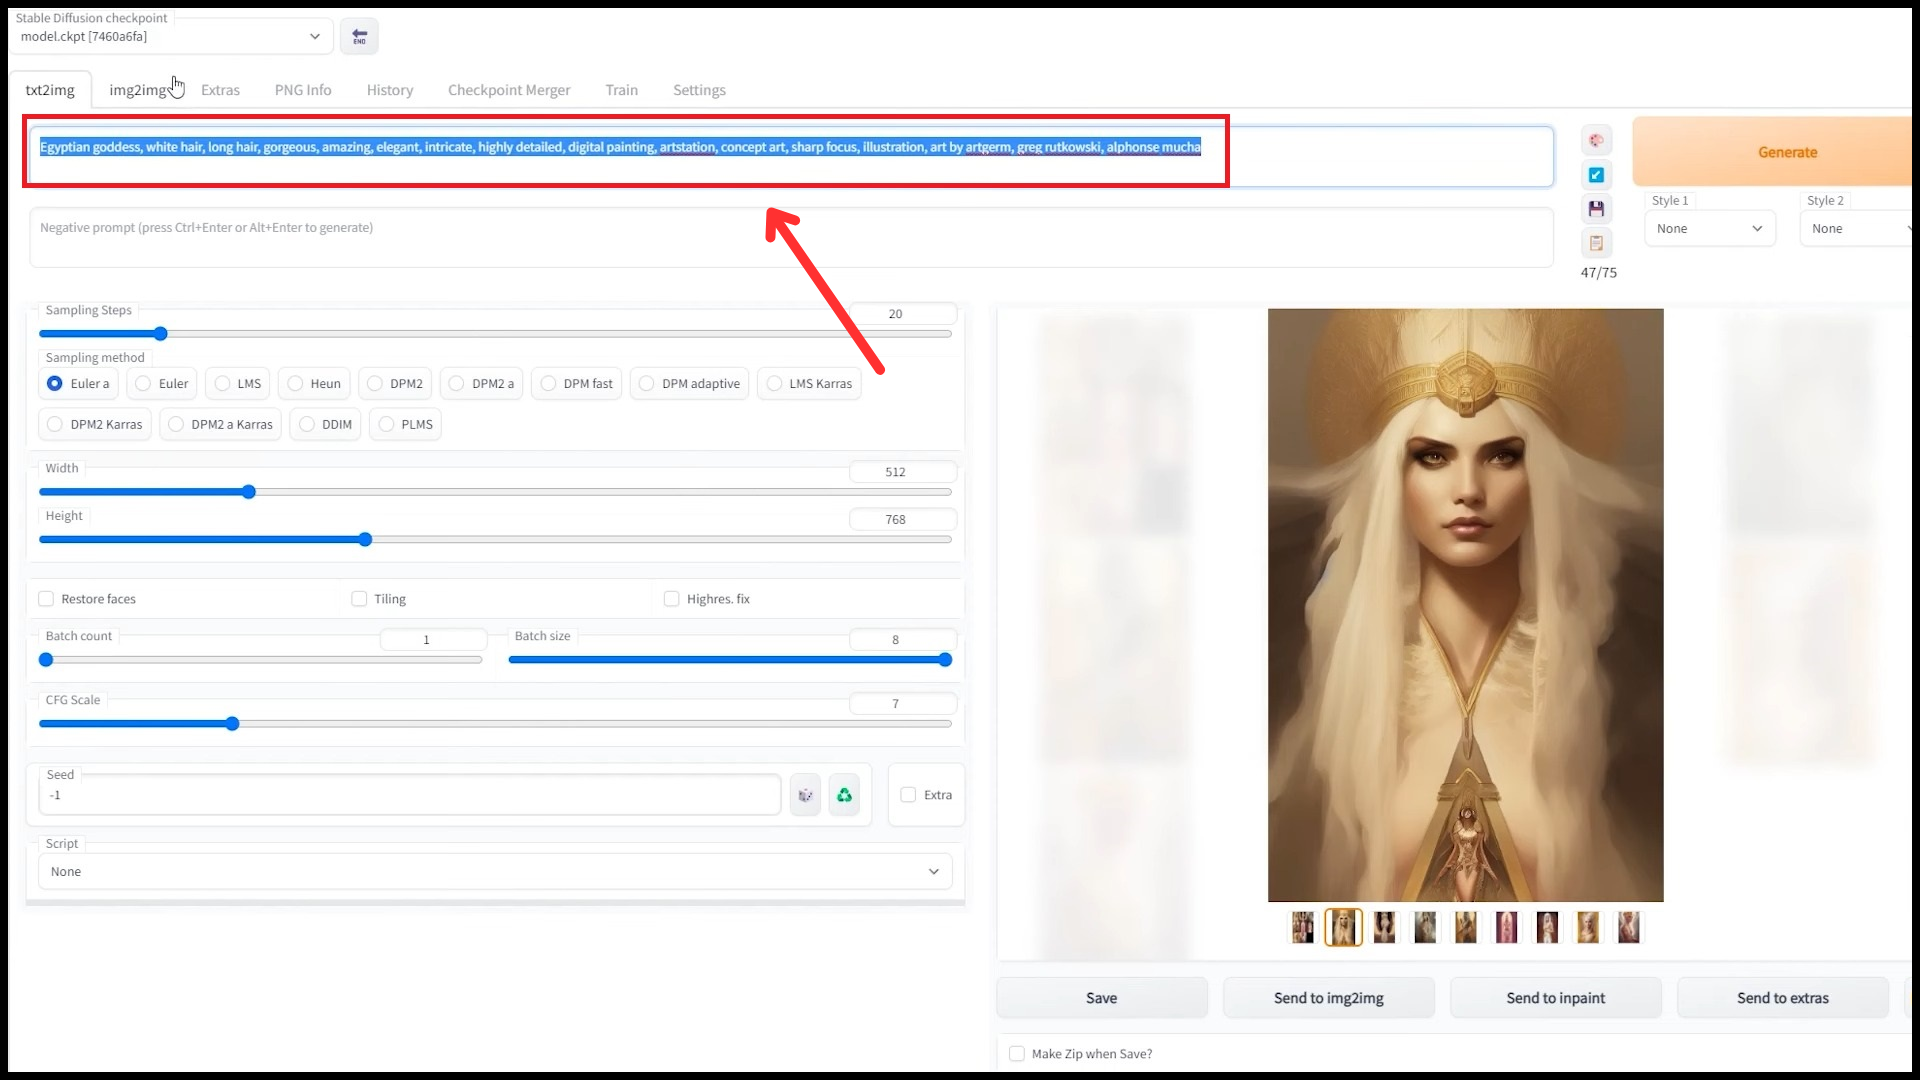
Before you start, save your image. That way, you won’t lose what you started with. Also, remember the exact prompt you used when you first made the image with the eyes that didn’t look right. Write it down or copy it.
Step 2: Access the Inpaint tab
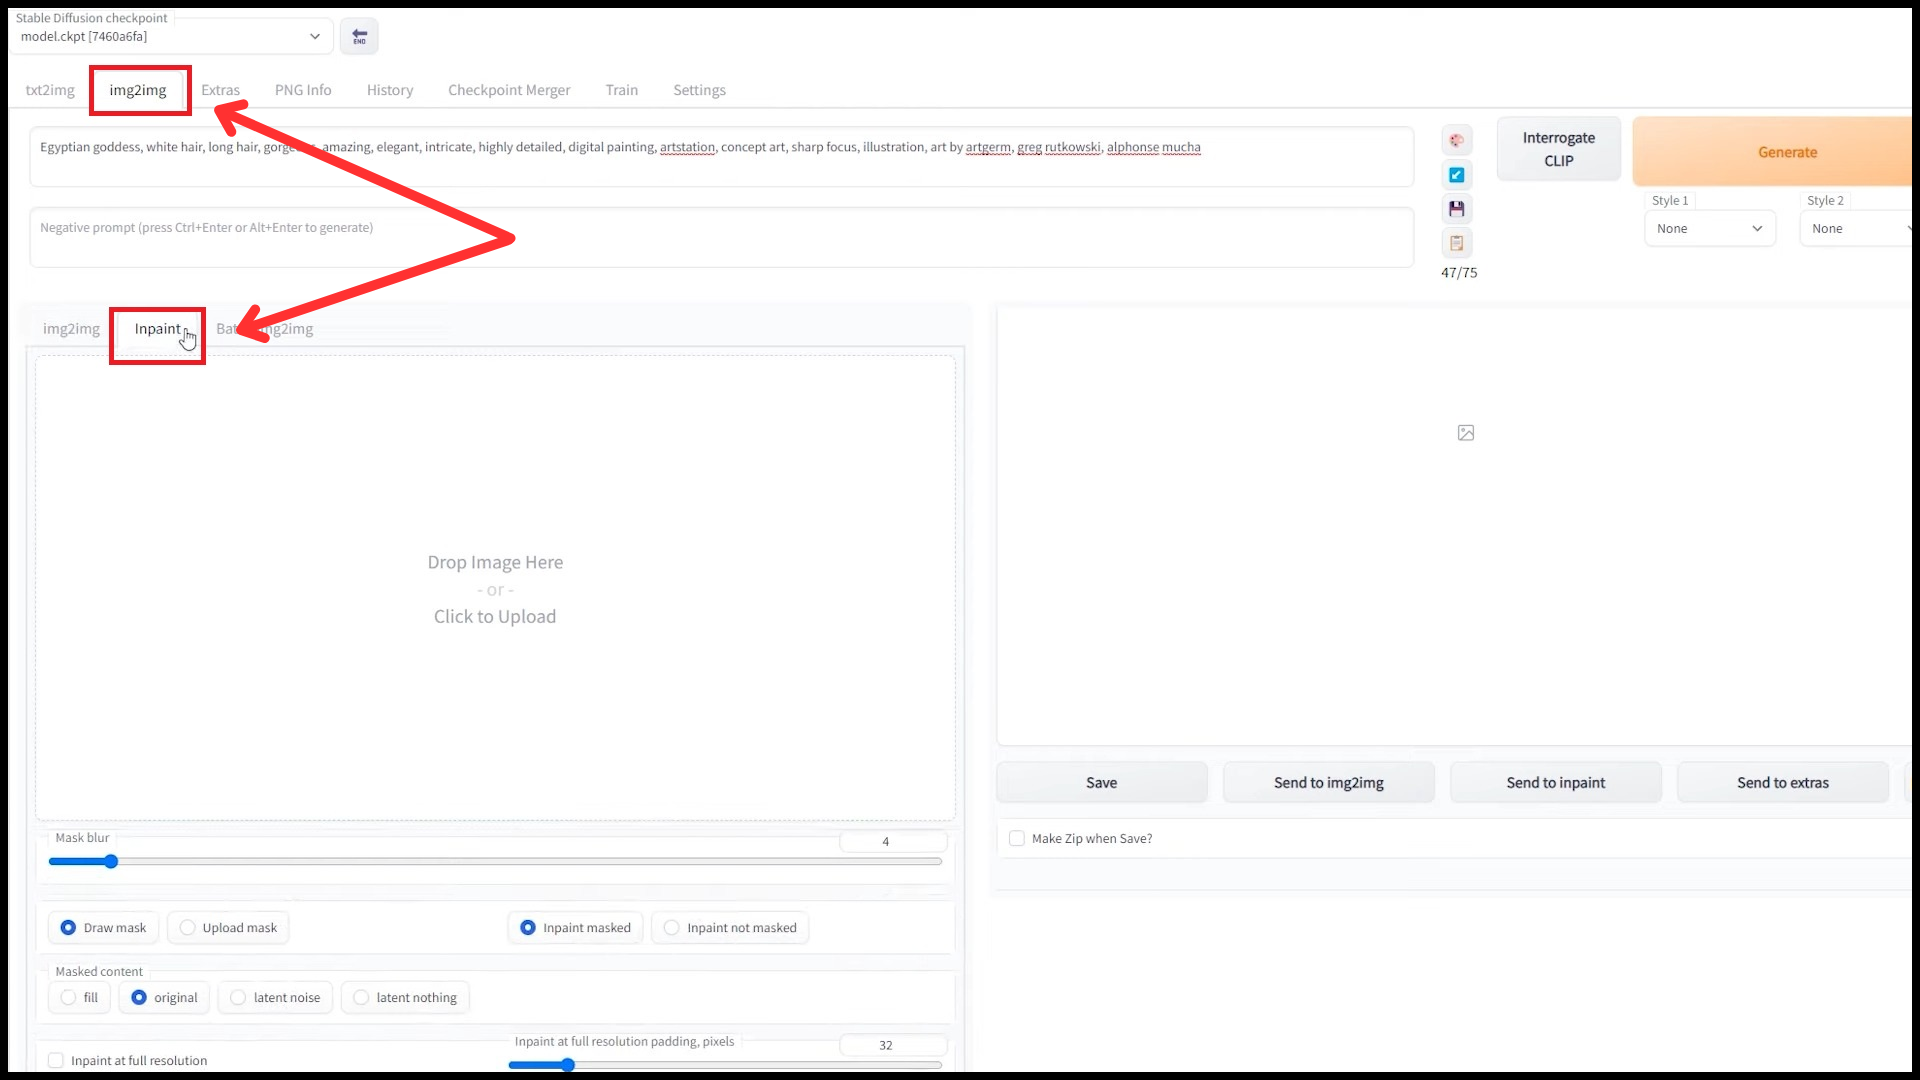
Click on the “img2img” button. Inside “img2img”, there’s an “Inpaint” option. Click it. You can use this tool to make changes to selected areas of an image.
Step 3: Import your image and mask the problematic area
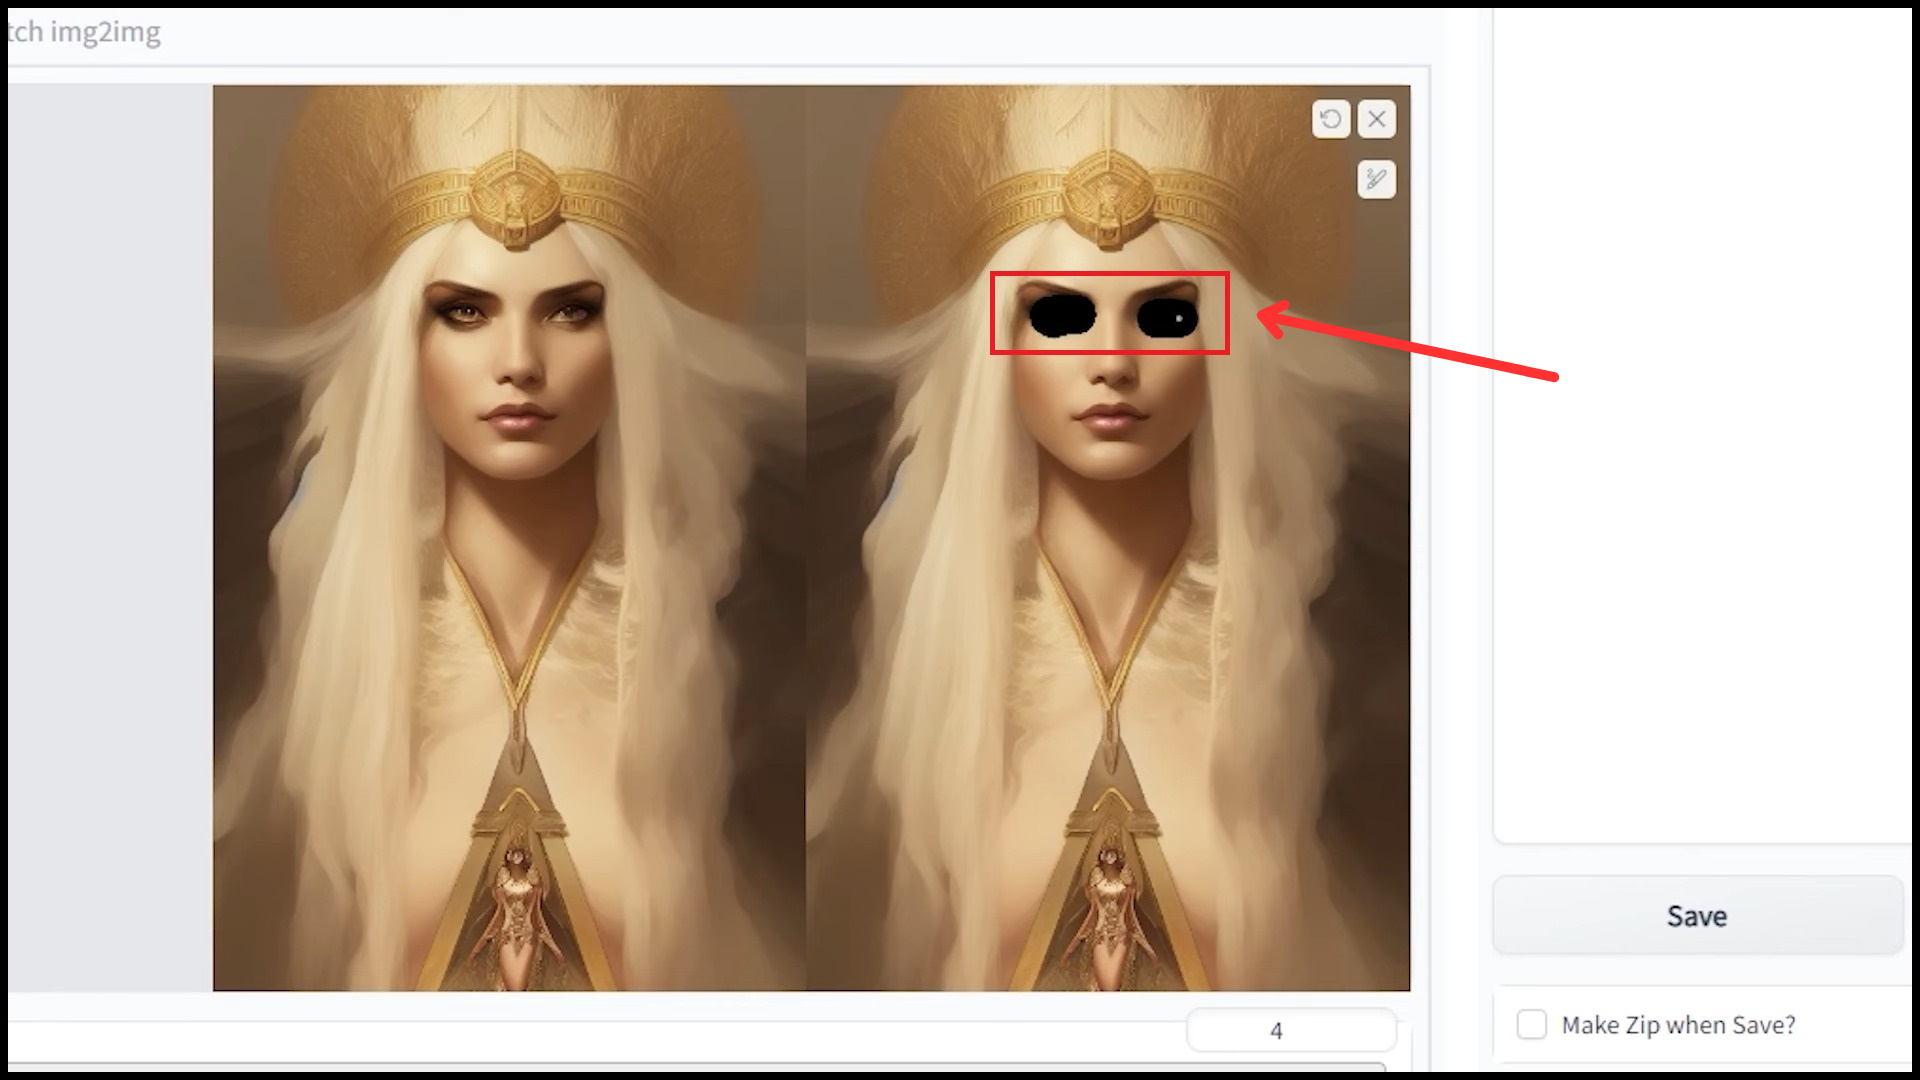
Drag and drop the image from the download folder. Use the brush or marker to highlight eyes that need fixing. This action will mark the areas that need to be modified.
Step 4: Adjust sampling steps and method
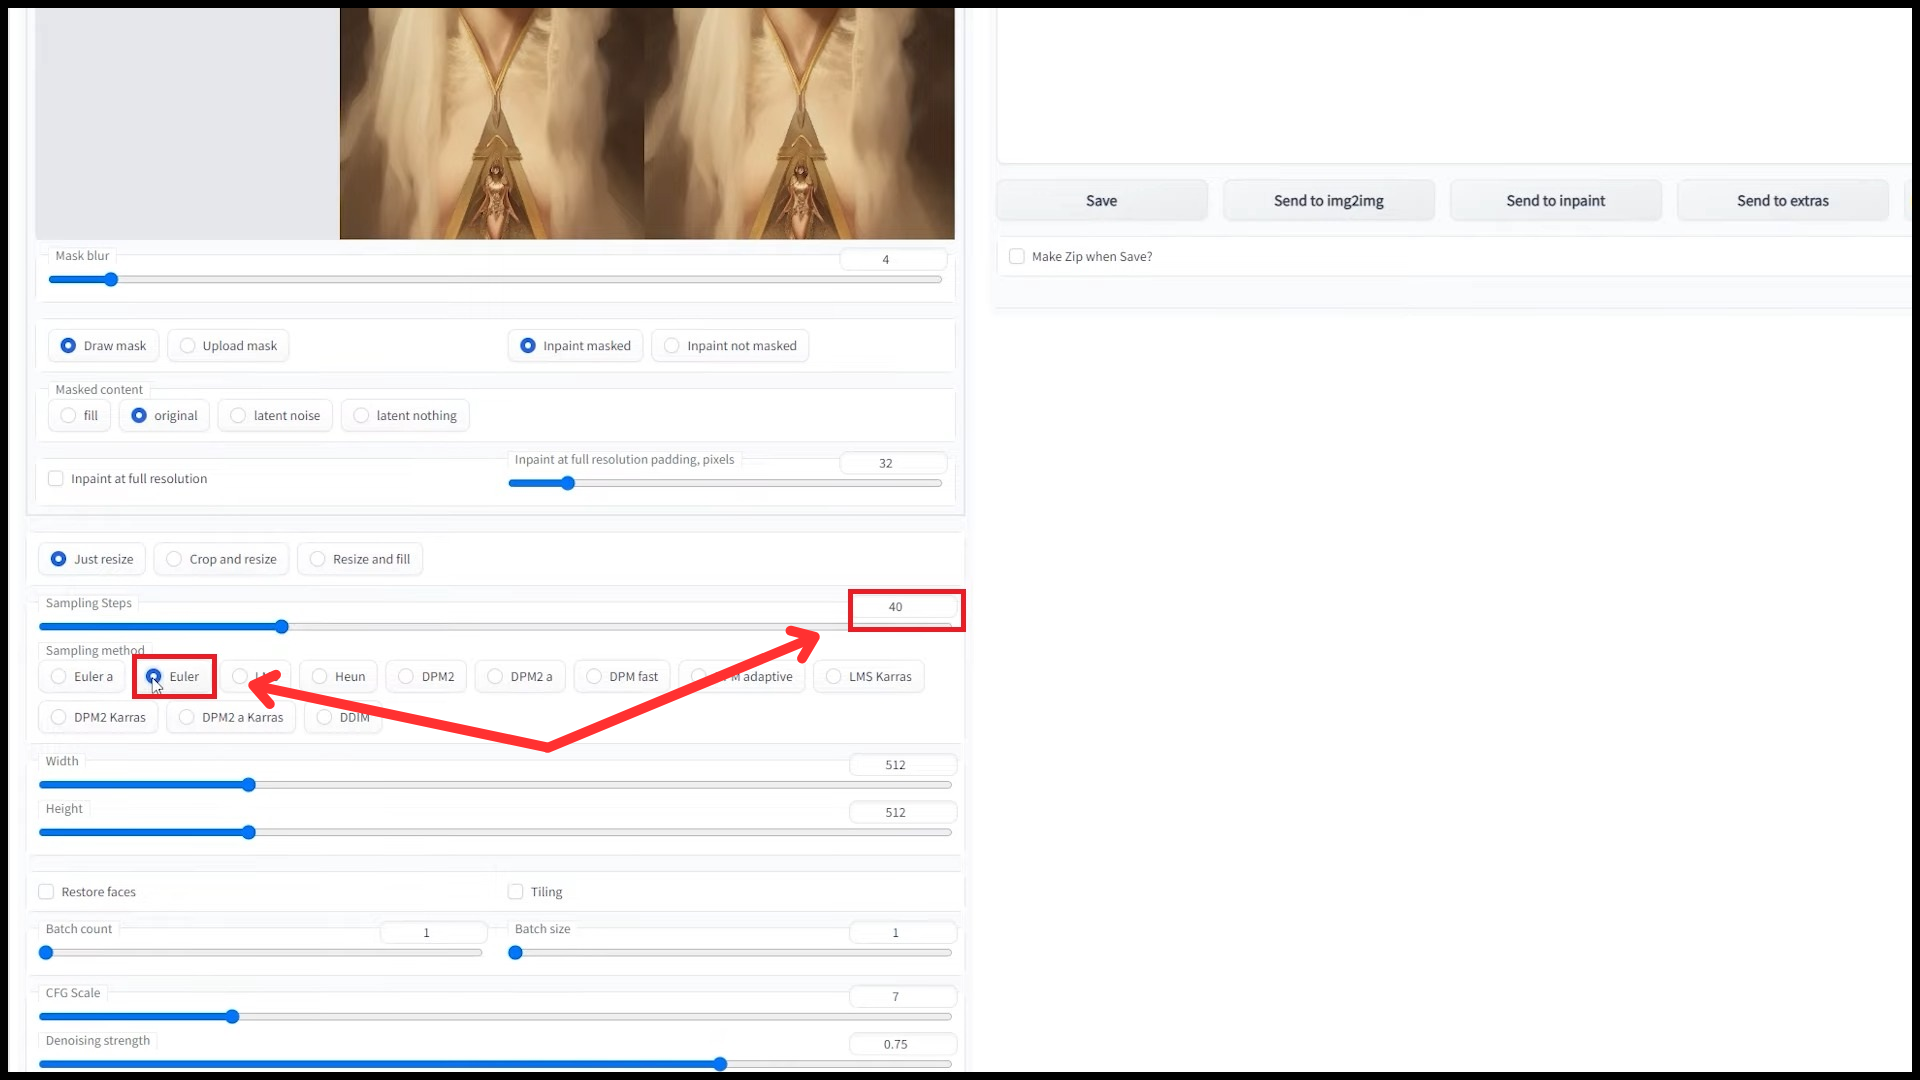
Set the sampling steps to 40. This tells the tool how many times to try and fix the eyes. Then, select the “Euler” method. Using this procedure, you can figure out the approach taken to sample and adjust the image.
Step 5: Match image dimensions
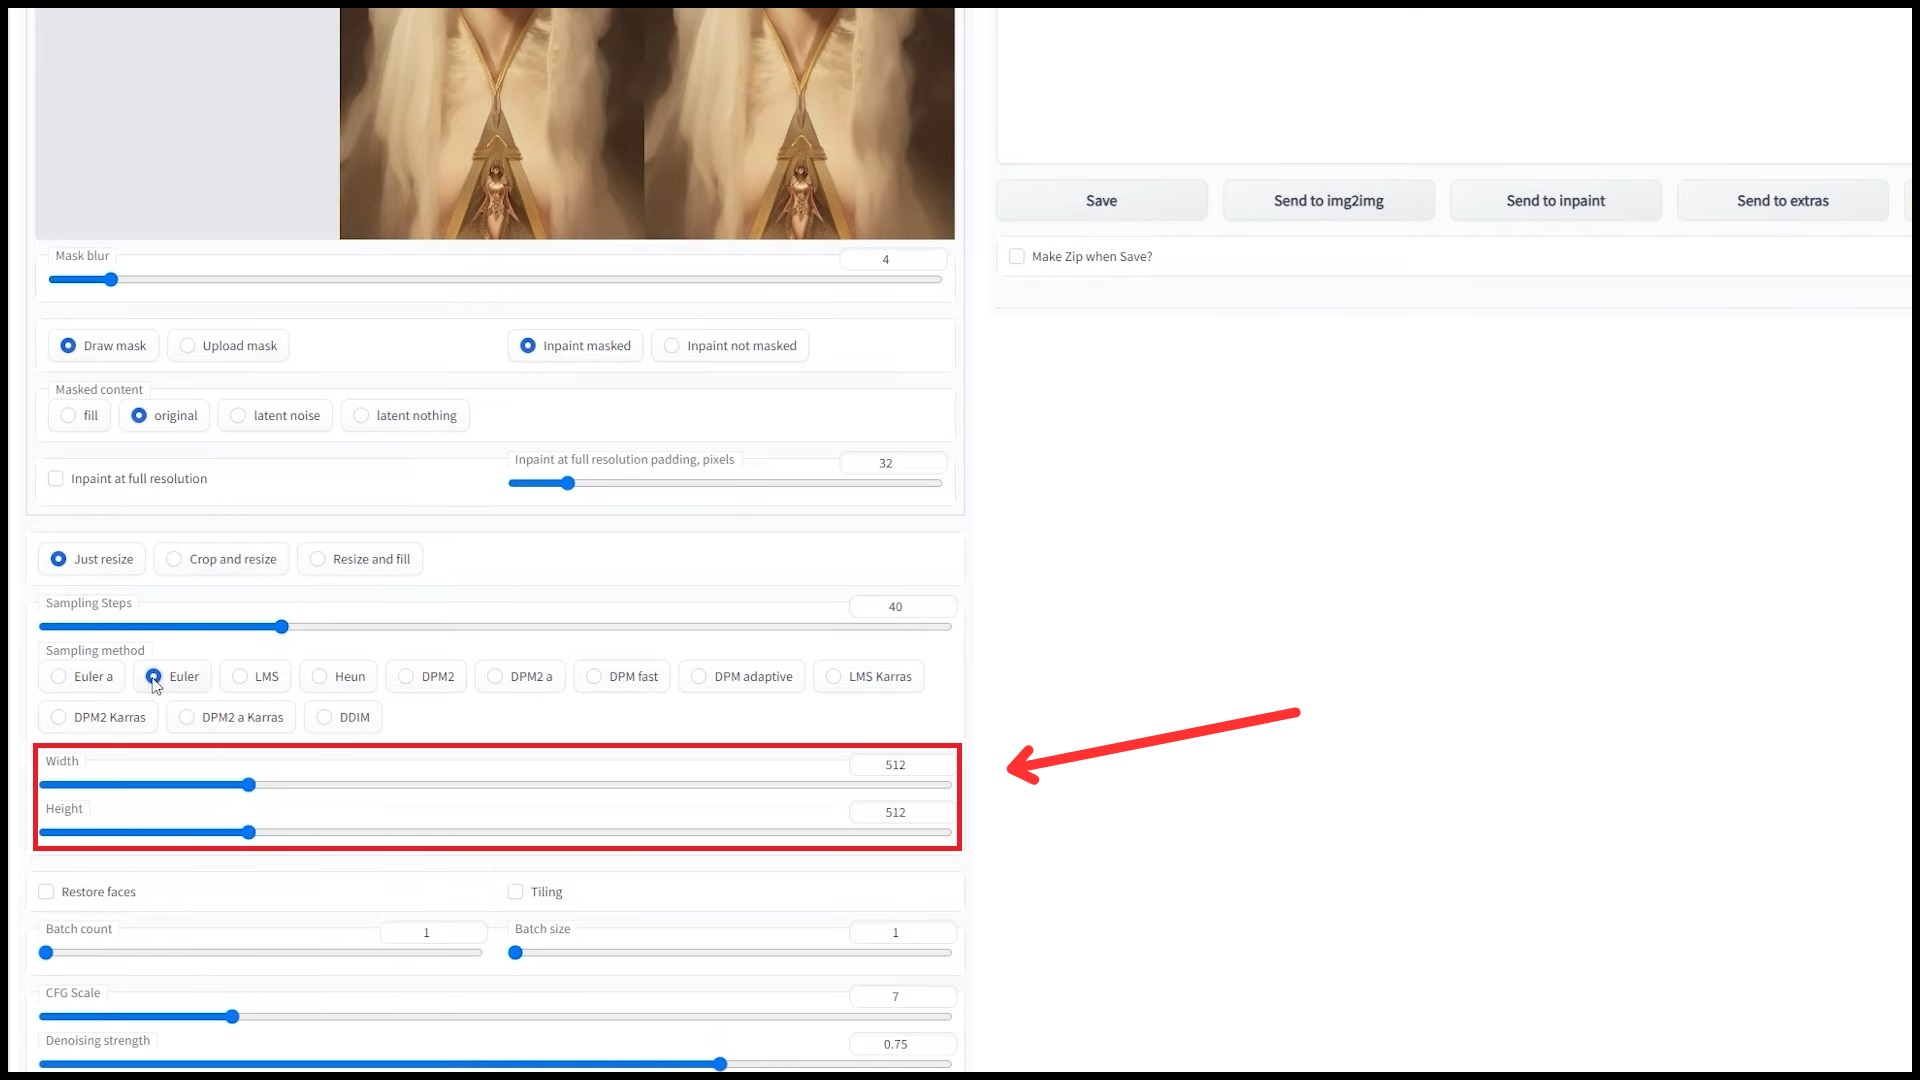
Ensure the size numbers for the width and height are identical to your original picture. This ensures your fixed picture doesn’t get too big or too small.
Step 6: Enable face restoration and increase the batch count
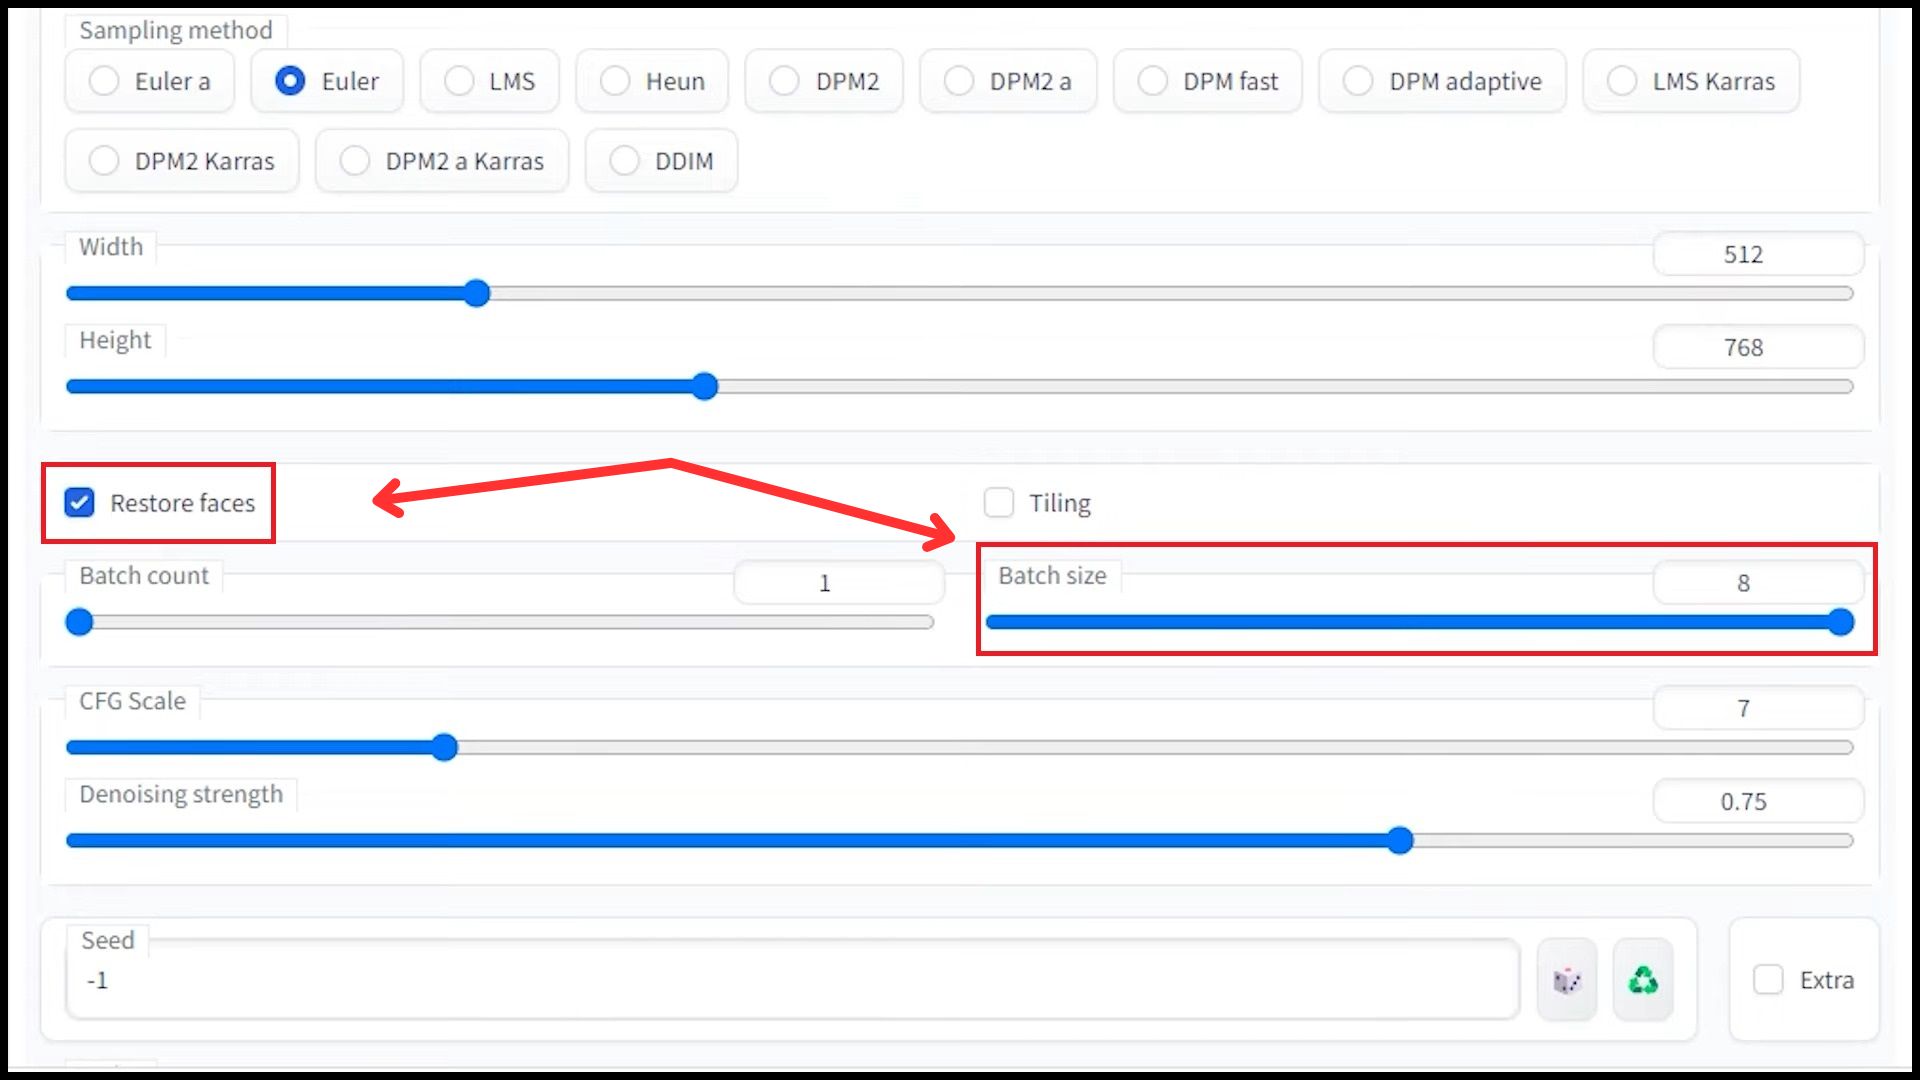
Select “Restore Faces” from the menu. This function recognizes and refines facial features, ensuring they remain consistent and realistic after corrections. Max out or increase the number of batches. This selection determines how many options or variations the tool provides for correcting the area.
7: Set Denoising Level
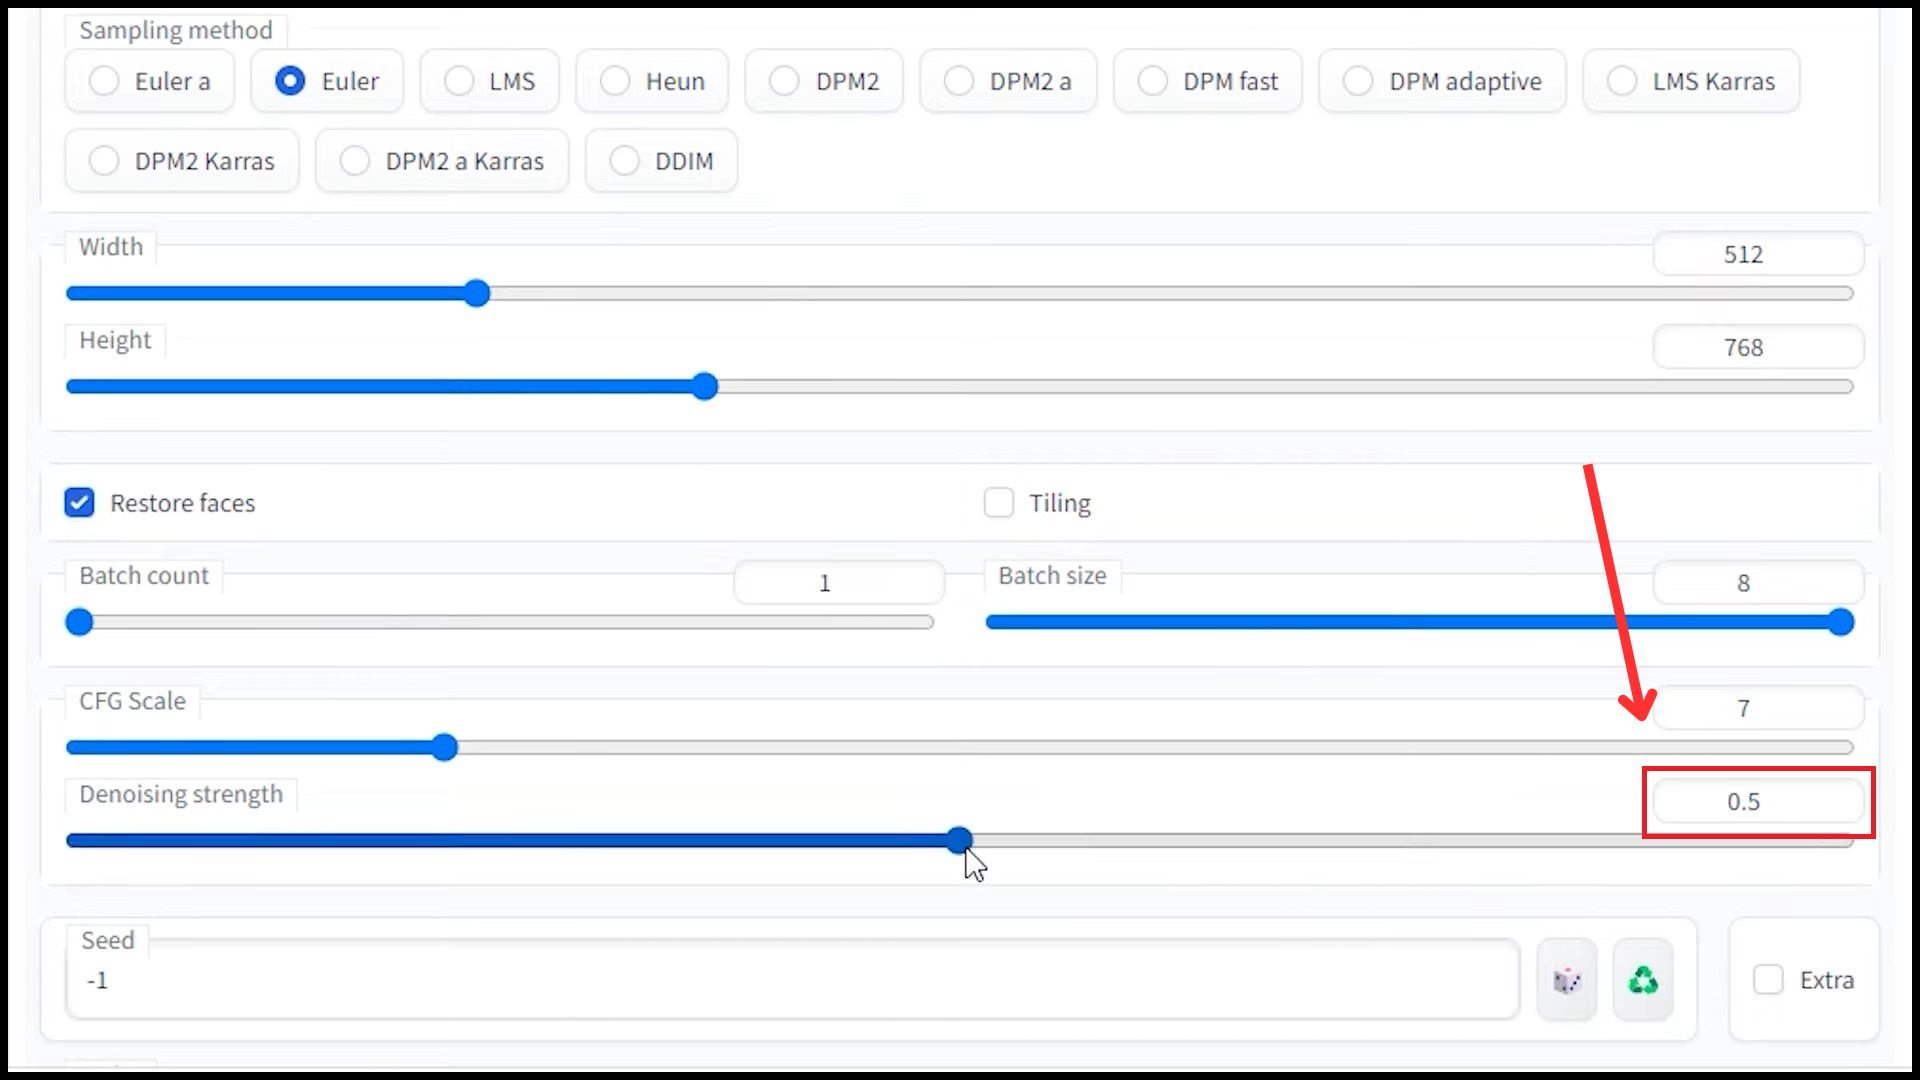
Adjust the parameter for denoise to 0.5. This setting determines the extent of noise reduction, with 0.5 providing a balance between detail retention and artifact reduction.
Step 8: Generate Corrected Images
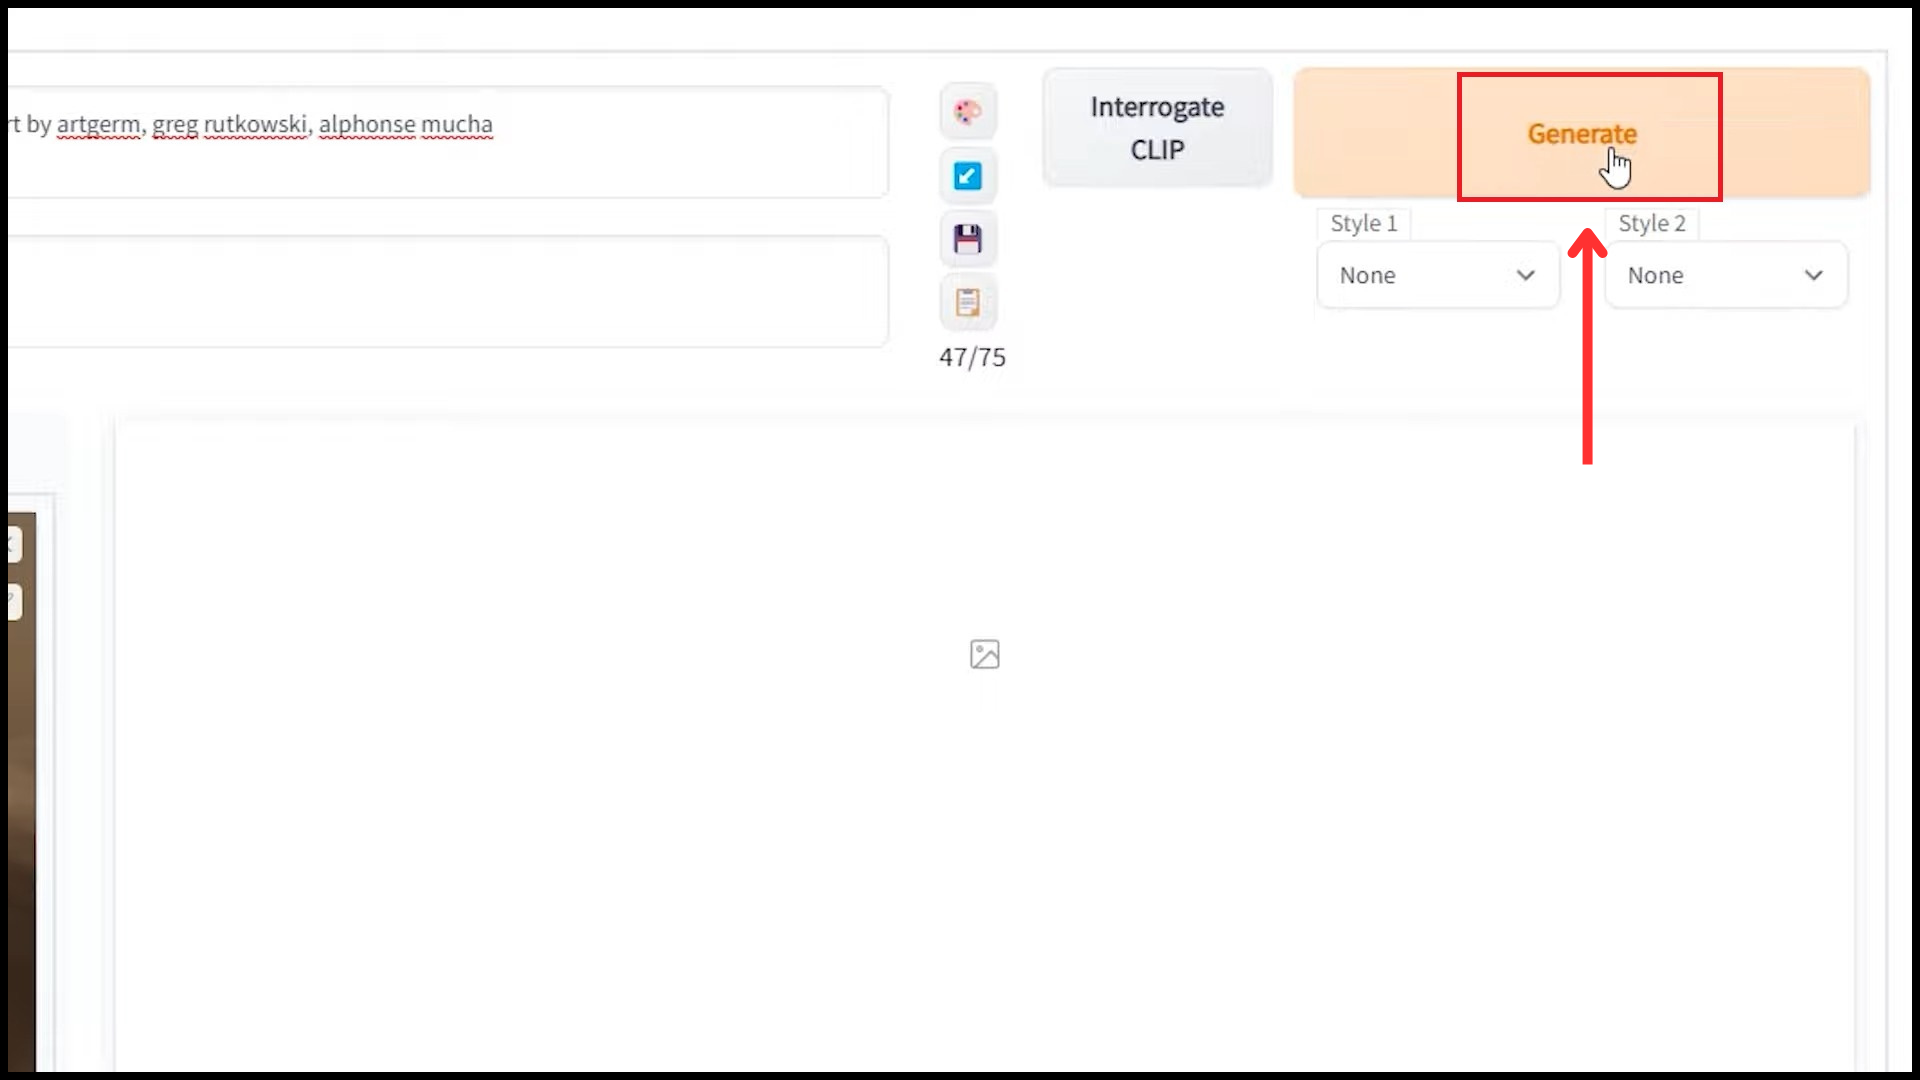
Click the “Generate” button and wait a little. The tool will produce images with fixed eyes. Look at them all and select the one you think looks best. If you are unhappy with the results, you can change the parameters and try again.
Images sourced from JAMES CUNLIFFE.
Inpaint in Stable Diffusion vs alternatives
Digital image editing is fun, and there are lots of tools to help. When talking about the Inpaint feature, Stable Diffusion is special. It provides delicate and natural adjustments, ensuring every touch-up feels natural and integrates seamlessly with the original image, and is primarily intended for images generated via text prompts.
Comparatively, Midjourney‘s version of Inpaint flourishes with complex textures and larger image regions. Due to its accuracy and keen dedication to detail, it is frequently utilized by professionals dealing with complex artwork.

Of course, there’s also the famous Adobe Photoshop. It’s been around for a long time, and many people love its Inpaint-like tools that fill in missing parts of pictures. It’s good for many things, but sometimes, it might not be perfect for AI-generated images.
Final Thoughts
You have generated AI images, and the character’s eyes don’t look good. Or you have a picture of yourself with distorted or bad eyes. The inpaint feature is here for you. Inpaint is like a magic touch for images. It helps fill in parts that might be missing or don’t look right.
Stable Diffusion’s Inpaint is especially good for those images created from text prompts. It understands the original vibe and blends changes smoothly, like a gentle artist at work. Remember the steps mentioned above and let the tool do its magic to fix the eyes in images.
Midjourney’s tool stands out for detail work, perfect for those complex touch-ups. Adobe Photoshop, an old favorite, offers a wide palette but might not always be the best for AI-generated images. It’s about choosing the right tool for the right picture.
FAQs
AI-generated images are advanced but sometimes have trouble making parts like eyes look just right. This is because human features vary greatly, and the AI models might not cover everything.
Inpaint in Stable Diffusion helps fix or change parts of a picture that might look bad, especially faces. It ensures images look as real and close to what we want as possible.
Yes, while it’s best for AI-generated images, you can use Inpaint on any image to make parts of it look better. However, the outcome might differ depending on the image’s origin and characteristics.
Like the one in Stable Diffusion, AI-based Inpaint uses smart learning to know how pictures look and feel. It fills in parts of an image so they match the rest well. Older ways might not get the look or feel right, so the changes might be more noticeable.
 Reviewed by
